

.png)
DIY Confetti Light-Bulb Ornaments (A Colorful, Easy Holiday Craft!)
- The Celebration Studio
- Dec 5, 2025
- 2 min read
If you need a simple, budget-friendly holiday craft that still feels personal and meaningful, these DIY Confetti Light-Bulb Ornaments are such a fun option. I made these last year using 4” clear light-bulb ornaments, and they turned out adorable — bright, cheerful, lightweight, and , perfect for gifting.
👀 Who This Craft Is Perfect For
If you’re a teacher, a room parent, or a mom looking for an easy holiday idea, these DIY confetti light-bulb ornaments are perfect. They’re budget-friendly, fast to make, and kid-approved. I made these for my son’s entire class last year, and they absolutely loved them.
This project is especially great for:
Teachers who need a quick classroom craft
Moms looking for inexpensive student gifts
Cricut beginners practicing small vinyl projects
Anyone without a Cricut (lots of no-machine options below!)
People searching for easy, Amazon-linked holiday crafts
They turn out bright, colorful, and completely customizable — even if you’ve never made ornaments before.
Affiliate Disclosure
This post contains Amazon affiliate links. As an Amazon Associate, I may earn a small commission when you purchase through my links, at no extra cost to you.
🛒 What You’ll Need
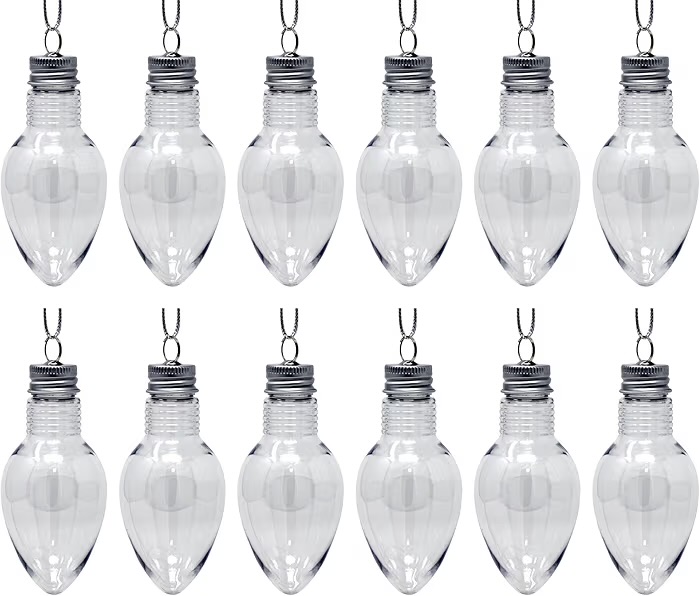
4” clear plastic light-bulb ornaments – https://amzn.to/43VepEF
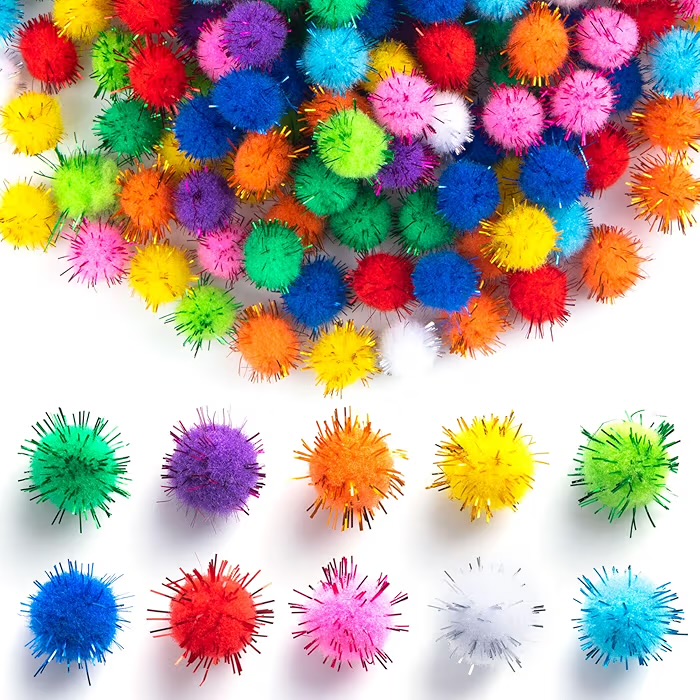
Mini pom-poms –
Rainbow:
Christmas Colors:
A pinch of loose glitter – https://amzn.to/48n3xAy
Small funnel
Optional- Decorative ribbon or ornament string
A way to personalize the front (Cricut or non-Cricut options below)
How to Make Them:
1. Fill the Ornaments
Remove the top and use a small funnel to pour in the pom-poms.
2. Add Glitter
Just a tiny bit adds sparkle without making a mess.
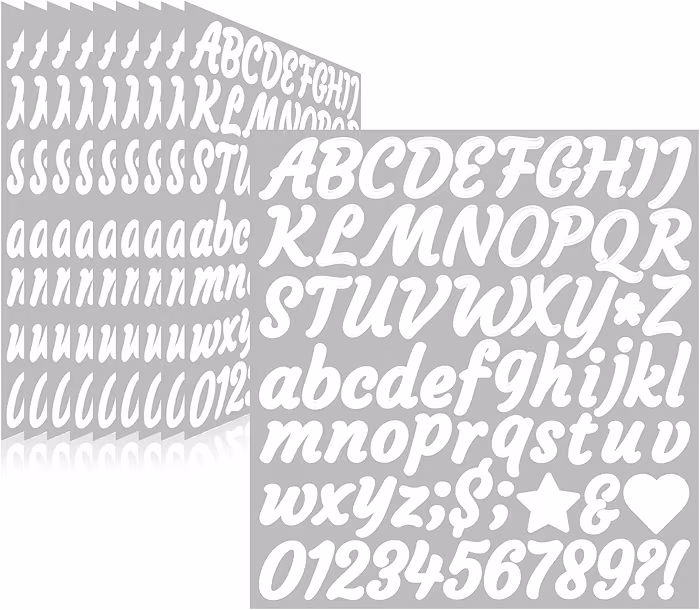
3. Personalize the Front
You can add names using vinyl, paint pens, stickers, or printable labels.
4. OPTIONAL: Add Ribbon
Tie a coordinating ribbon or cord through the top and they’re ready to hang.

✂️ For Cricut Users
If you do have a Cricut, here’s exactly how I made the vinyl names:
Font: Babette
Letter spacing: around –1.0
Ungroup → nudge letters until they touch → Weld
Size: about 2 inches wide for a 4” ornament
Cut in white permanent vinyl
Use transfer tape with tiny slits to help it curve around the ornament
✎ No Cricut? No Problem!
Here are easy alternatives anyone can do:
1. Paint Pens
Hand write the names
2. Alphabet Stickers
Create names from letter stickers
3. Clear Printable Sticker Paper
Print names on your home printer → cut → stick
4. Pre-Printed Name Stickers
Type your name → they arrive ready to use
5. Tie-On Name Tags
A cute alternative: hang a tiny tag on the ornament instead

💡 Tips
Don’t overfill the ornaments
White lettering shows up best
These make great classroom gifts and stocking stuffers
Use a mix of pom-pom sizes for extra texture
📌 Pin This For Later
